Breathing New Life into Old Garden Gear
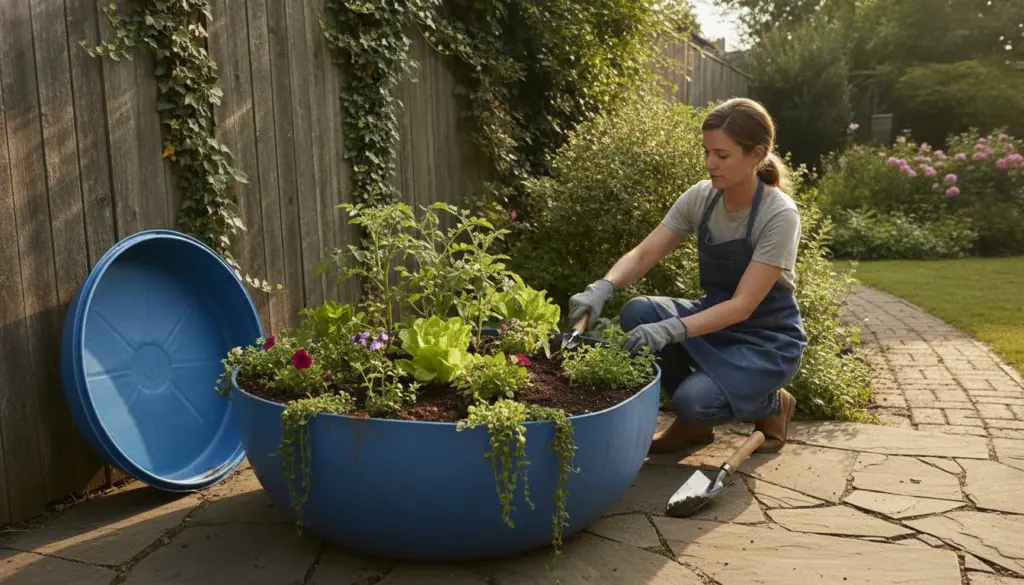
Creative reuse of everyday items works beautifully in your own backyard, and transforming an abandoned water container into a compact planter is a particularly brilliant project. This clever conversion rescues bulky plastic from the landfill while creating an ergonomic gardening station that protects both your back and your budget.
Whether tucked into a sunny corner of the patio or placed directly in the yard, this makeshift planter offers fantastic growing potential. You get to skip the complicated assembly process usually required for wooden kits, making it an incredibly rewarding weekend task for any green thumb.
Step-by-Step: From Rain Barrel to Raised Bed
Converting a heavy-duty container into a thriving garden ecosystem does not require advanced DIY skills. Just follow this straightforward preparation process:
- Remove the base: Start by cutting out the entire bottom using a jigsaw or a heavy-duty utility knife. If you remove the floor completely, insert a fine wire mesh to keep rodents out. Alternatively, drill numerous large holes. This vital step prevents waterlogging and allows excess moisture to escape into the earth below.
- Select the right spot: Position your container directly on unsealed ground, such as an existing garden border or a patch of lawn. Direct soil contact encourages beneficial microorganisms and earthworms to migrate upward into your fresh soil.
- Build a drainage base: The lowest tier should always consist of bulky, coarse materials. Toss in chopped branches and thick twigs, followed by a generous layer of natural wood chips.
- Layer compost and soil: Next, add a mixture of fallen autumn leaves and fresh grass clippings, topped with rich, mature compost. Finish it off with specialized raised bed potting mix. Mixing in some well-rotted horse manure will give your future crops a fantastic nutritional boost.
- Add optional cladding: To elevate the aesthetics, you can screw some leftover timber boards together to create a rustic, wooden outer shell.
- Start planting: Thoroughly moisten your fresh soil structure. Now your favorite vegetables and culinary herbs can move into their new home. Give everything one final, gentle watering to help the tender roots settle.
Ideal Plants for Your Barrel Garden
The distinct layering technique generates massive amounts of natural nutrients as the organic matter breaks down. This warm, fertile environment is absolutely perfect for specific types of crops.
- Heavy feeders thrive here: Plants that demand high nutrition, like juicy tomatoes and sprawling zucchini, will explode with growth in this rich setup. Bushy bell pepper varieties also adapt wonderfully to the confined space.
- Quick-growing greens: Leafy lettuces, crisp radishes, and essential kitchen herbs like parsley and chives make excellent choices for the surface layer.
- Cascading beauties: Maximize your vertical space by incorporating trailing plants. Nasturtiums look gorgeous spilling over the rim, while hanging strawberries can even be tucked into small holes drilled directly into the side walls.
Upgrading the Look and Winter Preparation
Gardening at waist height is highly comfortable and naturally deters many ground-dwelling pests, keeping your leafy greens much safer from hungry slugs. Since naked plastic is not always visually appealing, consider wrapping the exterior with natural reed mats or applying a coat of vibrant, weather-resistant paint to match your outdoor decor.
As the cold season approaches, winterizing becomes essential. A plastic container packed with freezing, wet soil is highly susceptible to cracking under pressure. This makes those bottom drainage holes absolutely vital for preventing seasonal frost expansion.
If you are overwintering hardy perennials, wrap the outside of the barrel with thick burlap or insulating bubble wrap to protect the dormant root systems. You could also empty the entire structure in late autumn, though keep in mind this means you will have to rebuild your carefully constructed organic layers from scratch the following spring.