Why Cookware Loses Its Luster So Quickly
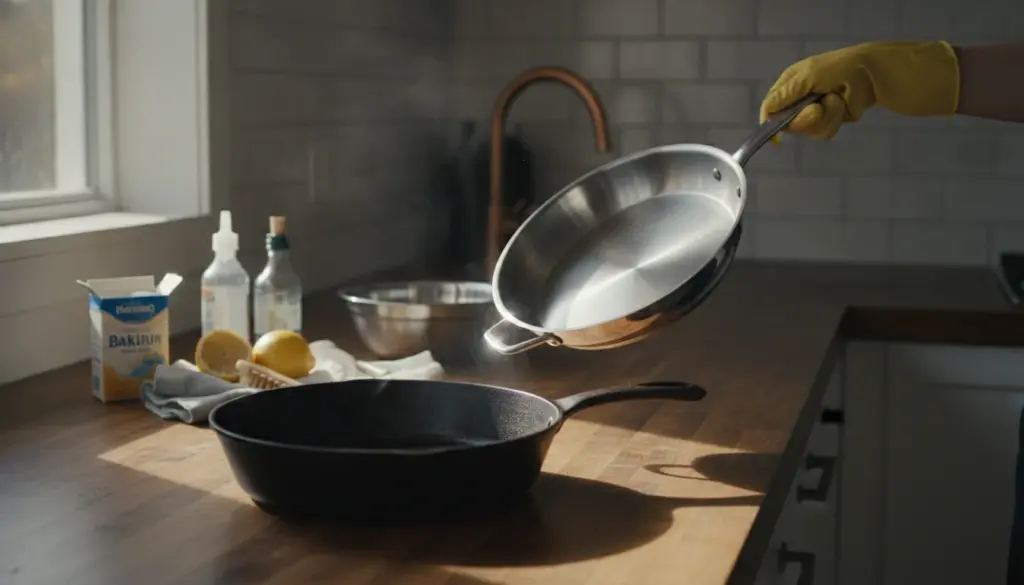
A fantastic dinner party usually concludes with a daunting pile of crusty, burnt skillets. Staring at the sink, the endless scrubbing can feel incredibly frustrating. While many home cooks immediately reach for harsh, overpriced commercial degreasers, those intense chemicals are rarely necessary. By utilizing a few basic pantry staples, you can restore your cookware’s brilliant finish surprisingly fast—without damaging your hands or inhaling noxious fumes.
Even the highest-quality stainless steel or cast-iron pots eventually develop a dull, brownish appearance. As culinary professionals know, this discoloration doesn’t mean your equipment is ruined; it is simply the natural result of regular, high-heat cooking.
- Fats carbonizing and baking onto the surface at high temperatures
- Starchy and salty residues cementing themselves to the bottom
- Hard water minerals leaving behind a cloudy, stubborn film
- Excessive heat exposure, particularly when preheating an empty skillet
- Leftover dish detergent that wasn’t thoroughly rinsed away
Over time, these layers of scorched food and oil act like an impenetrable barrier. The longer this buildup sits, the tougher it gets to remove, often making industrial-strength chemicals seem like the only option. However, pans that appear completely worn out are typically just microscopically filthy. With the right technique, you can easily coax that original shine back out.
The Surprisingly Effective Budget Combo: Baking Soda and Vinegar
The secret behind this highly effective, wallet-friendly cleaning strategy relies on a simple chemical reaction between two common household items: standard white vinegar and sodium bicarbonate, commonly known as baking soda. These accessible ingredients cost pennies, can be found in any grocery store, and are incredibly versatile far beyond baking or whisking up salad dressings.
Step-by-Step Guide to Rescuing Scorched Pans
This restorative technique works wonders on stainless steel and metal-lined cookware. If you are dealing with delicate non-stick coatings, you will need to proceed with a bit more caution, which we will cover shortly.
- Scrape the surface: Use a wooden spatula to gently dislodge the thickest burnt pieces. Avoid metal utensils entirely to prevent permanent scratching.
- Submerge the stains: Add enough warm or hot tap water to completely cover the scorched zones at the bottom of the skillet.
- Add the acid: Pour roughly one glass of standard white vinegar (5–8% acidity) into the water. Let this sit undisturbed for ten to fifteen minutes.
- Simmer gently: Place the cookware on the stove and slowly bring the liquid to a light boil. Let it simmer for three to five minutes. You will likely see crusty bits naturally flaking off during this stage.
- Cool and drain: Remove from the heat and allow everything to cool down for a few minutes before pouring the murky liquid down the drain.
- Apply the abrasive: Sprinkle a generous layer of baking soda over the still-damp bottom and sides. A slight fizzing reaction will occur, helping to lift the remaining grime.
- Scrub carefully: Using a soft, non-abrasive sponge, rub the surface in circular motions. You can add a tiny drop of dish soap here if desired.
- Rinse and dry: Wash thoroughly until all white powdery residue is gone. Immediately wipe dry with a clean tea towel to prevent water spots from forming.
This powerful trio of heat, mild acidity, and a gentle abrasive effortlessly breaks down stubborn grease barriers without compromising the underlying metal.
Tackling Stains on the Outside of the Pan
Often, the exterior of our cookware degrades even faster than the interior. Gas burners, in particular, tend to leave behind unsightly soot and dark scorch marks. Fortunately, a slightly modified version of this pantry hack works beautifully on the outside, too.
DIY Cleaning Paste for Exterior Scorch Marks
To target those tough exterior stains, you need a thicker mixture that won’t immediately run off the curved sides:
- Take 2 to 3 tablespoons of baking soda.
- Stir in just a few drops of water or vinegar until a thick, spreadable paste forms.
Smear this heavy paste directly onto the discolored exterior zones and let it sit for a good ten minutes. Afterward, scrub vigorously with a soft brush or sponge. For severely neglected, heavily carbonized bottoms, you might need to repeat this paste application a second time.
Expert tip: If your cookware features wooden or plastic handles, never submerge the entire piece in a vinegar bath. Carefully restrict your cleaning efforts solely to the metal surfaces.
Material Cautions and Safety Limits
Even though you are utilizing food-safe ingredients, boundaries still exist. Keep these essential precautions in mind to protect both your kitchenware and yourself:
- Avoid prolonged boiling in aluminum: Leaving boiling vinegar in thin aluminum pans for too long can pit and degrade the metal.
- Protect non-stick surfaces: Never touch Teflon or similar coatings with steel wool or aggressive scouring powders.
- Shield sensitive hands: While baking soda and vinegar are inherently mild, the repetitive friction of scrubbing can dry out or irritate sensitive skin. Wearing dish gloves is highly recommended.
- Prevent thermal shock: Always let a hot pan cool completely before exposing it to cold water to prevent the metal from permanently warping.
Recognizing When a Pan is Truly Beyond Repair
Not every piece of cookware is destined to last a lifetime. Certain warning signs indicate that your skillet is suffering from more than just surface grime:
- Deep gouges piercing through the non-stick layer
- Flaking, peeling, or blistering inside the cooking zone
- A severely warped base that wobbles unevenly on a flat stovetop
- Persistent rust spots that immediately return after a thorough scrub
When physical damage occurs, cleaning will no longer save it. At this stage, food safety becomes the primary concern, as you absolutely do not want loose chemical flakes leaching into your meals.
Building a Better Cookware Routine
Once you see the dramatic results of a deep clean, the next logical step is maintaining that pristine condition without committing to a weekly scrubbing marathon. Implementing a few simple habits makes a massive difference:
- Manage your heat: Never blast an empty skillet on maximum heat, especially over a direct gas flame.
- Soak instantly: The moment you finish serving, add a splash of warm water to the cooling pan to loosen food remnants.
- Quick maintenance masks: Occasionally treat your pots to a speedy baking soda facial—wet the surface, rub in the powder, wait five minutes, and rinse.
- Store thoughtfully: Always ensure pans are bone-dry before putting them away, and avoid stacking them while damp.
By treating your kitchen gear like high-quality tools rather than disposable items, you will significantly reduce household waste and save considerable money on replacements.
The Science Behind “Baked-On Grease”
In everyday kitchen terminology, we frequently complain about baked-on grease. From a chemical standpoint, this refers to culinary fats and sugars that have reacted to intense heat and completely carbonized. This process creates a remarkably rigid, porous crust that firmly anchors itself into the microscopic scratches and natural imperfections of the metal.
Vinegar excels at softening mineral deposits and calcified bits, while baking soda neutralizes lingering acids and provides a gentle, non-scratching abrasive action. Working in tandem, they compromise the structural integrity of this carbonized shell, allowing a basic sponge to wipe it away effortlessly. This chemical breakdown is exactly why this frugal approach rivals expensive commercial degreasers.
Worst-Case Scenario: Surviving a Culinary Disaster
Imagine you get distracted and completely scorch a batch of milk while making a cream sauce. The bottom is coated in thick, pitch-black, acrid-smelling flakes. The immediate temptation is to either throw the pot in the trash or resign yourself to hours of aggressive scouring.
Instead, rely on this proven rescue operation:
- Remove the pot from the heat source and let it cool down safely.
- Use a wooden utensil to firmly push away the thickest charred debris.
- Pour in the water-vinegar solution and simmer as outlined earlier.
- Drain the liquid, coat the bottom in baking soda, and scrub methodically.
- Repeat the process once more if stubborn shadowy marks remain.
Most of the time, the metal survives the ordeal perfectly intact, perhaps with only minor cosmetic discoloration. For a utilitarian tool designed to endure daily open flames, a slight shift in color is rarely an issue.
Maximizing Your Household Cleaning Budget
Frugal home chefs quickly realize that these basic pantry staples can tackle multiple chores. The same white vinegar that saves your burnt skillets will effortlessly dissolve limescale on your kitchen faucet or sink basin. Meanwhile, the baking soda that lifts grease from your pots can double as a refrigerator deodorizer or a gentle scrub for stainless steel sinks.
Adopting this methodology offers a fantastic dual benefit: it drastically reduces the clutter of specialized toxic sprays under your sink while keeping your home exceptionally clean. Ultimately, having pots that shine brilliantly is just a highly satisfying bonus of a smarter, more sustainable kitchen routine.