Why Covering Your Old Tiles Makes Total Sense
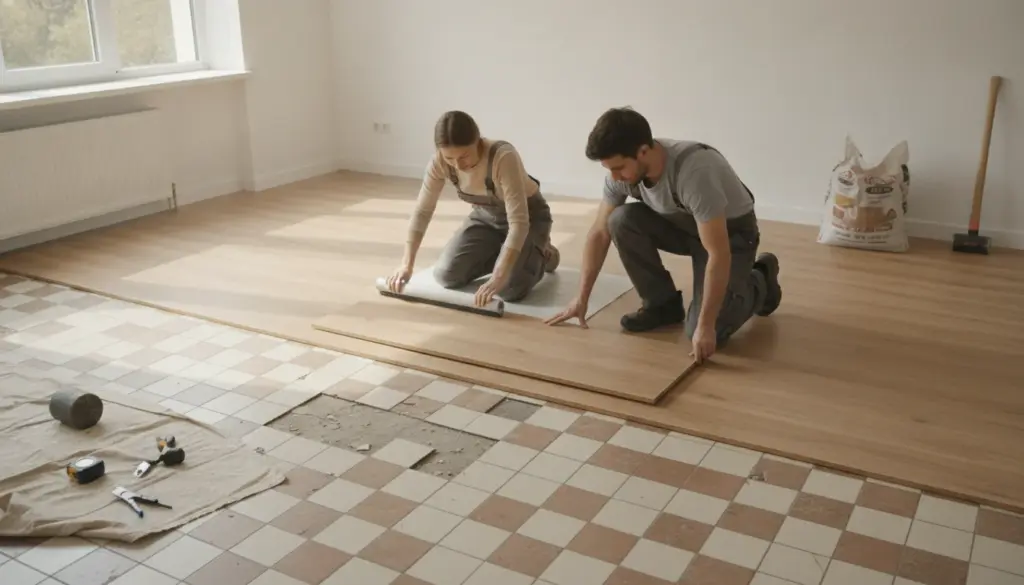
Most homeowners recognize the struggle: the tiles are perfectly clean, but the aesthetic is hopelessly stuck in the 1990s. Tearing out a floor usually involves days of heavy dust, noise, and expensive demolition. Fortunately, there is a highly effective, modern workaround that completely skips the sledgehammer.
Traditional floor renovations demand renting dumpsters, breaking up stubborn ceramics, and completely rebuilding the subfloor. This exhaustive process drains both your budget and your patience, especially if you recently purchased a home burdened with an outdated “museum” floor.
Instead, applying a premium liquid overlay straight onto the old surface transforms the space instantly. The deep grout lines vanish, creating a sleek, unified expanse that immediately modernizes the room. Daily maintenance becomes much easier, dirt has fewer places to hide, and the seamless surface feels surprisingly comfortable underfoot.
The secret behind this rapid transformation is a high-grade decorative resin, typically formulated from durable epoxy or polyurethane. This liquid mixture flows effortlessly over the dated tiles, eventually curing into a tough, impermeable shield designed to last for decades.
How Decorative Resin Transforms Your Space
Because the resin goes on as a fluid, it naturally levels out, optically erasing the busy grid of grout lines beneath it. By carefully selecting the right tint and sheen, you can completely overhaul your home’s interior design language in a matter of days.
Some of the most frequently chosen color palettes include:
- Warm stone and sandy hues for a grounding, natural atmosphere
- Crisp, cool grays that perfectly capture an industrial or loft-style vibe
- Bright whites and off-whites to maximize light reflection in tighter areas
You can also customize the final texture, choosing between matte, satin, or high-gloss finishes. A matte or subtle satin glow beautifully complements a cozy living room, while a slightly glossier surface might be ideal for a hallway—provided you account for slip resistance.
Perfect for Kitchens, Bathrooms, and Living Areas
Since cured resin creates a watertight and highly scratch-resistant barrier, it performs exceptionally well in virtually any room, including heavy-traffic zones like bathrooms and toilets. Kitchens benefit immensely from this seamless design. Without grout lines trapping stubborn grease and food particles, keeping the cooking area pristine takes a fraction of the time.
For wet environments, specialized anti-slip additives can be mixed in to ensure the floor remains safe even when soaked. Conversely, a living room floor can feature a soft, silky topcoat that delicately bounces natural light around the space, adding an instant touch of luxury.
Whether you reside in a rugged downtown apartment or a bustling family home with playful pets, a properly finished resin floor adapts beautifully to your daily lifestyle.
The Golden Rule: Evaluate Your Existing Base
Before mixing a single drop of product, you must strictly assess the condition of your current tiles. This is precisely where enthusiastic home improvers often stumble.
A structurally compromised floor with cracked or loose ceramics requires immediate attention. If you ignore structural flaws, the new resin will simply mirror that movement, inevitably leading to ugly fractures in your brand-new finish.
Step-by-Step: The Seamless Floor Makeover
Professional installations follow a strict sequence to guarantee longevity. While experienced DIYers might tackle portions of this, never underestimate the power of thorough preparation.
1. Deep Cleaning and Degreasing
Every piece of furniture must be removed to allow for intensive scrubbing. Stubborn grease, leftover soap, and old wax layers will completely ruin the product’s adhesion. Expect to use heavy-duty degreasers, hot water, and rigorous mechanical scrubbing before letting the surface dry entirely.
2. Repairing and Leveling
Any wobbly tiles need to be glued down or completely replaced. Deep grout joints and surface chips must be meticulously filled and leveled out. The ultimate goal is to create a rock-solid, flat canvas capable of effortlessly supporting the liquid overlay.
3. Applying the Essential Primer
Highly glazed or ultra-smooth ceramics usually demand a specialized bonding primer. This crucial base coat ensures the heavy-duty resin grips tightly to the old floor, eliminating the terrifying risk of future peeling.
4. Mixing and Pouring the Resin
These systems generally involve two specific components that must be accurately mixed just before application. Once combined, your working window is strictly limited. The material is rapidly spread using a specialized roller, trowel, or squeegee. Handling expansive rooms requires genuine skill to avoid visible overlap marks and inconsistent coloring.
5. Curing and Final Protection
After the pour, the floor needs absolute peace to harden and cure. Depending on the room’s temperature and the specific chemical makeup, the area will be off-limits for one to several days. Often, a final transparent topcoat is applied to boost grip and resist daily scuffs.
Budgeting: DIY Kits vs. Hiring a Professional
For compact spaces like a downstairs powder room or a utility closet, consumer-grade kits are widely available. These typically start around 18 euros per square meter for basic materials. However, this base price assumes your underfloor is already flawless; otherwise, extra primers and leveling compounds will quickly inflate the bill.
If you hand the project over to an experienced specialist, expect total costs to hover between 100 and 150 euros per square meter. This premium rate comprehensively covers essential prep work, top-tier materials, and skilled labor. The final invoice shifts depending on structural complexity, custom color choices, and specific anti-slip requests.
Investing in a professional generally guarantees a superior, sleek finish, drastically reducing the odds of unsightly bubbles, weird color shifts, or noticeable roller streaks.
Avoiding Common Pitfalls and Maintenance Tips
Those brave enough to attempt this themselves often encounter a few classic traps. Rushing the critical degreasing phase or applying the mixture outside the strict time window can ruin the entire project. Fluctuating room temperatures also cause the chemicals to cure unevenly.
Additionally, many forget to calculate the newly added millimeter thickness. Always measure your door clearances beforehand to see if they need a quick trim, preventing annoying scraping later on.
Aesthetically, a resin overlay feels modern and slightly cooler to the touch than natural wood. However, it pairs beautifully with underfloor heating systems. The exceptionally thin buildup ensures optimal heat transfer, as long as your underlying tiles were already compatible.
Routine upkeep is incredibly straightforward. Regular sweeping and a quick pass with a damp mop using gentle cleaners will keep the floor glowing. Avoid harsh chemical solvents or abrasive powders, as these easily degrade the topcoat. If you have energetic toddlers or pets with sharp claws, opting for a matte finish cleverly disguises superficial scratches.
Still on the fence? Try testing the waters in a small hallway or guest bathroom first. This gives you a true feel for the material’s durability and maintenance. If you love the result, expanding the look into your kitchen and living room is a logical next step for a beautifully cohesive interior.