Have you or your family members been struggling with a lingering sniffle, or has someone suddenly developed unexplained allergies? The culprit could very well be mould hidden inside your washing machine. Another telltale sign that you have a mould problem is the appearance of small black spots or specks on your clean clothes.
Here are the warning signs that your machine is due for a deep clean:
- The machine isn’t draining (or is draining very slowly): Most likely, your drain pump filter or the drain hose is clogged.
- Loud rattling or banging noises during the spin cycle: There might be coins, hairpins, bra wires or other small metallic items trapped in the drain filter.
- The machine is taking ages to fill, or won’t take in water at all: The water inlet filter is likely clogged with limescale or debris.
- The detergent is left behind in the drawer: If you are forced to put washing powder directly into the drum because the drawer isn’t clearing, the drawer and its housing need an urgent clean.
- Your clothes smell musty or damp after washing: Bacteria and mildew have set up camp inside your machine, and it’s time to evict them.
- Rusty-coloured spots on light clothing: Rust particles are getting onto your clothes. You need to clean the water inlet filter and the detergent drawer compartment.
- Grey streaks or poorly washed clothes: Grime and soap scum have accumulated on the drum, the door seal, and the glass, which needs washing away.
Remember: If your washing machine is dirty inside, the wash quality will be extremely poor. Mould and grime will circulate with the wash water, depositing directly back onto your clean laundry.
First-Time Use (for new machines)
The purpose of running a new machine for the first time is to check that everything works and to wash away any industrial grease or manufacturing oils. You don’t need to buy a special cleaning product for this – simply run a standard hot cycle at 60 °C empty with a little bit of your regular laundry detergent.
Step 1. Remove the Detergent Drawer
Are you sure the drawer on your washing machine cannot be removed? On almost all models, it is actually very easy. Check your user manual (or download it online by searching your model number), or search for a quick demonstration video on YouTube.
Most machines have a simple release tab or lever. You will find this on almost all popular UK brands like Hotpoint, Bosch, Beko, Samsung, LG and Miele. This tab is usually coloured (often light blue) or marked with the word “PUSH” or “MAX”. Simply press it down and gently pull the drawer straight out of the machine.
Step 2. Soak, Don’t Scrub
Save your hands and protect the plastic drawer by letting the cleaning products do the hard work instead of scratching it with abrasive sponges.
- Place the detergent drawer in a large washing-up bowl or bucket.
- Cover it with hot water and add an acidic cleaning product (such as Toilet Duck 5-in-1, Harpic Power Plus or an anti-limescale spray like Viakal).
- Do not use chlorine-based bleach: Bleach is incredibly difficult to rinse away entirely from the tiny corners of plastic drawers. If even a single drop remains, it will bleach and ruin your coloured clothes during the next wash cycle.
- Leave it to soak for a couple of hours. Within 10 to 15 minutes, you will see the limescale and rust stains dissolving.
Top tip: Leave the detergent drawer slightly ajar after every wash to let it air-dry. Better yet, pull it out and wipe it down with a dry cloth after the final wash of the day.
The Door Seal (Gasket)
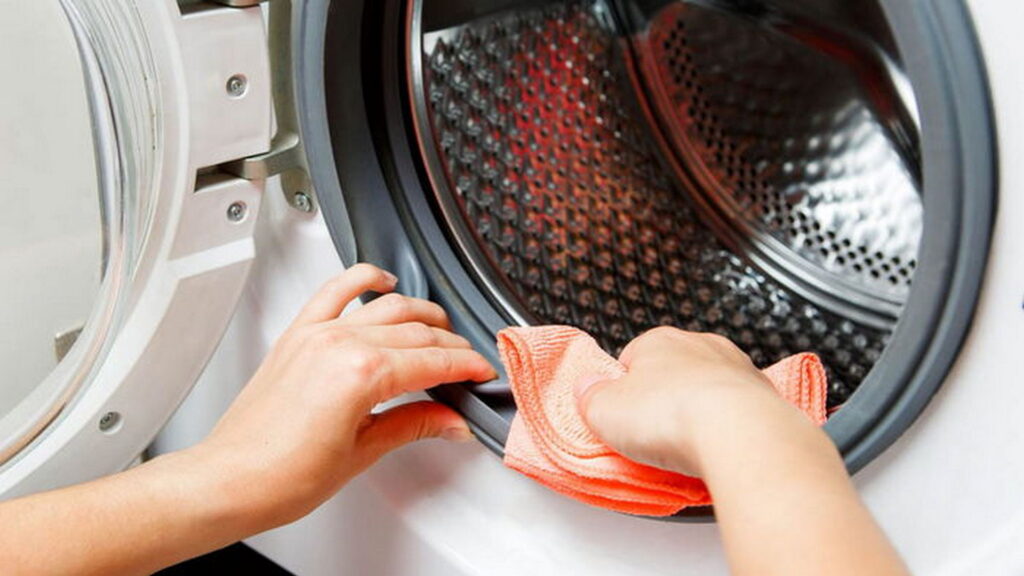
The rubber door seal is one of the most critical areas. Grime, stagnant water and mould in the folds of the rubber are in constant contact with your laundry – a major concern if you wash baby clothes or children’s garments. Wipe the rubber seal dry with a soft cloth after every wash, and check for any coins or small items trapped inside.
Keep a dedicated microfibre cloth next to your washing machine just for this purpose. Use it to wipe down the inside of the glass door regularly too.
Top tip: When buying a new washing machine, pay attention to the colour of the rubber seal. Some manufacturers (such as Haier) offer models with a blue/grey antibacterial door seal (ABT) that actively resists mould and bacterial growth.
Example of modern machine specifications:
Haier Washing Machine [Front loading, 7 kg capacity, 1200 rpm, steam function, dimensions: 59.5 cm x 85 cm x 46 cm], white finish with digital display.
How to clean the door seal:
- Wipe inside all the folds of the rubber seal. Remove any black mould along the entire circumference (wet wipes are great for the initial wipe-down).
- Use a cotton bud to clean out the small water drainage holes at the bottom of the rubber seal so water can drain away freely.
- Clean the area underneath the seal as far back as you can reach with a damp cloth.
- Make a thick paste using bicarbonate of soda (or soda crystals for heavier build-up – remember to wear rubber gloves!) and a small amount of cold water.
- Apply the paste to the rubber seal and leave it to work for 30 minutes.
- Run a quick rinse cycle to clear away the bicarbonate of soda.
Important: Ensure good ventilation in the room where your washing machine is kept. If it is in a utility room or bathroom, keep the door open (especially overnight) to prevent mould from forming on the walls or tile grout.
If the mould has been left untreated for too long, it will turn into a slimy layer that clogs the drainage holes. In severe cases, it is best to remove the rubber seal entirely (if your model allows) to wash it in a tub, or replace it altogether.
Products to Fight Mould and Musty Odours
Chlorine bleach and other heavy bleach-based cleaners will damage and degrade the rubber seal over time. Bleach causes the rubber to dry out and develop microscopic cracks. Mould spores settle into these tiny cracks, making them almost impossible to clean out in the future.
Instead, the most effective and gentle way to kill mould and remove bad smells is to use acidic products combined with a high temperature:
| Product | Active Ingredient | How to use |
| White Vinegar | Acetic Acid ($\text{pH } 2.4$) | Pour half a cup (around 100ml) directly into the drum and run an empty hot cycle at 60 °C or higher. |
| Citric Acid (powder) | Citric Acid ($\text{pH } 2.4$) | Put 100g of citric acid powder into the detergent drawer and run an empty hot cycle at 60 °C or higher (excellent for descaling). |
| Coca-Cola | Phosphoric Acid ($\text{pH } 4$) | Pour a 2-litre bottle of Coca-Cola directly into the drum and run a wash cycle with a pre-wash or soak option. |
| Commercial Acid Cleaners (e.g. Viakal, HG, Cillit Bang, Astonish) | Oxalic/Formic Acid | Use only as a last resort. Run an empty cycle at 40 °C. |
None of these remedies react negatively with the machine’s rubber or metal parts, providing a safe and gentle deep clean.
Be careful with very old machines: When descaling an old machine, you will also strip limescale off the heating element. In older appliances, heavy limescale build-up can sometimes hold worn parts together or plug microscopic leaks. Descaling a very old, unmaintained machine can occasionally lead to leaks.
The Drain Pump Filter
The drain filter is the absolute dirtiest spot in any washing machine, as all wastewater passes through it. Most people know it’s there, but very few clean it regularly. Manufacturers recommend cleaning this filter once a week to once a month depending on how often you wash.
If your machine is making a rattling noise or isn’t draining properly, check the filter first. You will often find loose change, screws, hairclips or lost buttons blocking the pump impeller.
How to clean the drain filter:
- Open the small access flap at the bottom front of the machine. On some models, you may need to clip off the entire plastic kickplate panel to access it.
- Lay a towel or shallow baking tray on the floor below the opening. Most machines have a small emergency drain hose next to the filter: pull out the plug and let the residual water drain into a cup first.
- Slowly unscrew the main filter cap anticlockwise, let any remaining water drain out, and pull the filter out. Remove all lint, hair and small items.
- Let the filter soak in the washing-up bowl with your detergent drawer for a bit.
- Clean the filter chamber, screw the filter back in tightly to prevent leaks, and close the flap.
The Drain Hose
Another hidden area that accumulates soap scum and greasy residue is the drain hose. Cleaning this can instantly solve persistent musty smells. Also, make sure the hose is installed with the correct high-level bend/U-bend to prevent wastewater siphoning back into the machine.
Because the drain hose on most modern washing machines cannot be removed without dismantling the back of the machine, you can clean it using this method:
- Unplug the drain hose from the waste pipe under your sink or in the wall, and drain any standing water into a bucket.
- If there is a partial blockage, try flushing it clean by directing your shower head down the hose (if you can reach the shower).
- Pour a couple of tablespoons of bicarbonate of soda into the hose, followed by a generous squeeze of concentrated washing-up liquid (such as Fairy Liquid).
- Put the hose back into the drain pipe without rinsing it through first.
- Leave the mixture to sit for 30 minutes.
- Run a quick rinse cycle to flush everything out. (Be prepared for a strong odour as the built-up grime is dislodged and washed away).
The Water Inlet Filter
This small mesh filter sits inside the valve opening where the water inlet hose connects to the back of the machine. It catches rust, limescale and grit from the main water supply.
How to clean the water inlet filter:
- Turn off the water supply valve to the washing machine.
- Unscrew the inlet hose from the back of the machine (have a cloth ready to catch any drips).
- Use a pair of long-nosed pliers or tweezers to gently pull out the small plastic mesh filter.
- Soak the mesh filter in some vinegar/limescale remover.
- Brush it clean with an old toothbrush.
- Pop the filter back in, screw the hose back on tightly, and turn the water supply back on.
Cleaning the Cabinet (Exterior)
The final step is cleaning the outside of the machine: Buttons, dial knobs, door hinges and the cabinet itself.
Powder residue and dust often get trapped in the gaps around the buttons and dials. A dry or slightly damp old toothbrush is perfect for brushing these tight spaces clean. Then, wipe down the rest of the machine with a damp microfibre cloth.
Take this opportunity to clean the floor under the machine and the walls behind it – static electricity causes large amounts of dust to accumulate there over time.
Finally, check that the machine is level by adjusting the screw-in rubber feet underneath. If the machine is unbalanced, it will vibrate heavily and make a lot of noise during the spin cycle, which can cause long-term damage. If you don’t have a spirit level, fill a clear plastic water bottle halfway, lay it flat on top of the machine, and use the water level as a guide.
The Drum
The drum is the hardest part to clean by hand but the easiest to keep clean using heat and chemistry.
You have three main options:
- Commercial washing machine cleaner (specialist liquid or powder from the supermarket).
- Natural methods (citric acid or vinegar, as detailed above).
- An empty hot wash: Run a hot cycle at 60 °C or higher once every three months to prevent grime, or once a month if you notice musty smells.
- The “Drum Clean” cycle: If your machine has a dedicated drum cleaning program, make sure you use it.
Preventive Maintenance: Golden Rules
- Alternate your washing temperatures: Don’t just run $30\text{–}40\text{ °C}$ quick washes. Run a hot cycle at $60\text{–}90\text{ °C}$ (for towels and bedding) at least once a month to melt away grease and soap scum in the pipes.
- Alternate liquid detergents and powders: Liquid detergents contain ingredients that can leave a slimy residue in the machine at low temperatures. Laundry powders contain oxygen-based bleaching agents that naturally sanitise at high temperatures, and the powder itself has a mild abrasive action that keeps the drum clean.
- Match your detergent to your laundry: Use liquid detergents or gels for delicates and darks at low temperatures. For white sheets, towels and heavily soiled items, use washing powder at $60\text{ °C}$ (which is also the minimum temperature needed to kill dust mites and neutralise their allergens).
- Do not overdose your detergent: More soap does not equal cleaner clothes. It only leaves excess residue inside the machine and makes your fabrics stiff.
- Let the machine air out: Keep the door and the detergent drawer slightly open after every wash to let moisture escape.
- Do not use the drum as a laundry basket: Sweaty or damp clothes left sitting inside the closed machine are a breeding ground for bacteria and mould.
- Remove laundry promptly: Never leave wet clothes sitting inside the drum for hours after the cycle has finished.